- All Posts
- /
- Newsletter subscriptions with Netlify Forms + Airtable + Vero Newsletters

-
 Chris Hexton
-
Updated:Posted:
On this page
Vero Newsletters is unique because it’s designed to connect to data sources that already hold your customer data rather than to capture and store your data one more time. It’s kind of like a “Lego” block: you can easily plug it in to the tools in your stack and build the right solution for your business.
Product companies can connect to their SQL database or data warehouse and query their user data directly. eCommerce companies can export data directly from the Customer menu in Shopify. Or you can do both!
But what about a simple newsletter or blog subscription? How do you setup a subscription form and where do you store the subscribers if Vero doesn’t store them for you?
There are lots of ways! In this tutorial we’ll show you how to solve for this use case with Netlify, Airtable and Vero Newsletters.
Overview
In this tutorial we’ll show you how to:
- Use Netlify forms to collect newsletter subscribers.
- Store the email addresses of those subscribers in an Airtable Base.
- (Optional) Generate a secure URL that you can send to the customer for them to double opt-in.
- (Optional) When a customer clicks the secure URL store them as “confirmed” in your Airtable Base.
- Send a newsletter to your subscribers.
This approach gives you control of your data and access to tools and methods to sort and organise, enrich and process your customer data however you want. Plus, your data lives in less places and you can customise your workflow exactly how you like it.
Example code
The full code for this tutorial is available on Vero’s Github account.
1. Use Netlify forms to collect newsletter subscribers
Netlify’s forms are pretty magical. The general flow is:
- Add a form anywhere on your site.
- Mark that form with
data-netlify=true. - Netlify will automatically receive submissions for the form and store them locally.
-
Netlify will also trigger an event called
submission-createdin the background, enabling you to hook in and run functions to do stuff with the data you’ve collected.
Here’s the basic form we’re using:
Two things to note:
-
data-netlify=trueis what tells Netlify to handle the form submission. -
action="/preference-subscription-thanks/"tells Netlify to redirect to a static page with the URL/preference-subscription-thanks/once the submission has completed. If you don’t include anactionthen you’ll see a standard, Netlify-branded “Thank you” page in production.
2. Saving subscribers to Airtable
Whenever any form is submitted and handled by Netlify, Netlify
will trigger a background event called
submission-created. This will only
fire for “Verified” submissions (Netlify has
it’s own spam detection that can lead to “Unverified
submissions”, which we won’t cover here, but look out for that
when testing in Netlify!)
We can hook into the background event and run our own code
whenever a form is submitted. To do this we need to create a
Netlify function called submission-created.js.
Netlify will automatically detect this function and run it
whenever there is a form submission.
We created an Airtable base called “Newsletter subscribers” and
within that Base we created two tables: “Raw subscribers” and
“Confirmed subscribers”. Whenever our form is submitted we store
the email in the “Raw subscribers” table. We created
a save_user method to handle this:
We want to execute this when our specific form is submitted. As
our form has the name newsletter-subscribe we can
use this to narrow in on this particular form (as
submission-created.js will run whenever any Netlify
form is submitted).
Helpful notes:
-
Functions run differently locally and in
production.
When testing this out locally with the
Netlify CLI we found that the
submission-created.jsfunction ran synchronously whenever we submitted our form. In production this isn’t what happens. In reality the function will run some time after the submission occurs (it’s usually just a few seconds). In other words: the local behaviour is a little different from production. -
Where to put the function. I found that
putting my
.jsfunctions in a folder calledfunctionsat the root level of my project and specifying the functions folder simply as"functions"in mynetlify.tomlfile ensured they were detected and compiled. It’s also worth noting that once compiled functions will be found at the URL.netlify/functions/your_function_name— this is the compiled location not where you should store your functions. I found this confusing early on. -
Lambdas exit as soon as you “return”. Thanks
to the
wonderful Netlify community
I received this explanation for how Lambda functions actually
execute:
“[Lambda] code is executed in the order it’s written [..]
In serverless functions the program exits [as soon as] the
final return statement is hit. Thus, you need to make heavy
use of async/await [if you’re processed code that needs to
get a response]”. This is why our Airtable code uses a
Promise— it’s vital. If you’re writing Netlify functions that call out to other services like Airtable and are having issues, read up on Promises in Node.js.
3. (Optional) Generating a secure double opt-in link
This step is optional but good practice. Our code sample includes code to securely encrypt the user’s email into a unique hash. The idea here is that this hash can be forwarded to your automated email service of choice (like Vero Workflows) and sent to the the subscriber.
To generate the secure link I used this “Strong Encryption and Decryption in Node.js” guide from Vance Lucas. You can check out the code for the encryption in Github.
Once generated you’ll want to send the confirmation link to the user using a transactional email/automated email tool. In our example we trigger an event to a Vero Workflows instance to trigger an automated workflow. This workflow inserts the secure confirmation link and emails the subscriber. Here’s the code we use for this:
4. (Optional) Processing and saving confirmations
When the link is clicked Netlify processes the request, decrypts the hash, extracts the subscriber’s email and stores it in a “Confirmed subscribers” table within our Airtable Base.
To do this we create a function called
preference-confirmation.js. When called, this
function extracts the hash from the URL, decrypts it, saves the
record to Airtable and redirects to a static thank you page:
In the Netlify _redirects file I’ve created a
redirect from /preference-confirmation/* to
the preference-confirmation function. If we didn’t
do this we’d have to send the user to
/.netlify/functions/preference-confirmation/* ,
which is not super user-friendly URL.
To save the user in Airtable we use the exact same code as we used before, simply changing the destination Airtable Table in our Base.
5. Send a newsletter to your subscribers
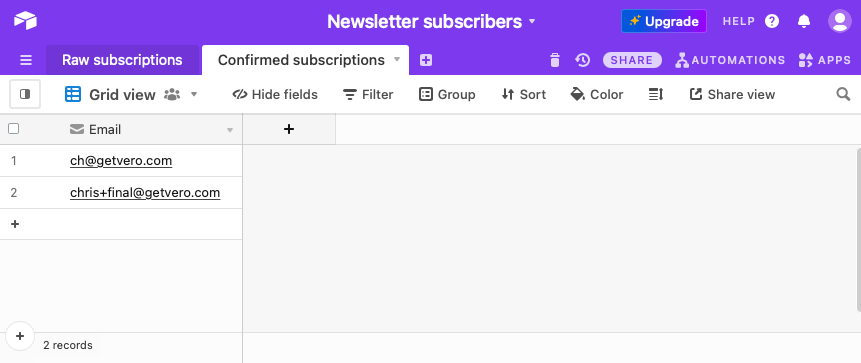
If all goes well you should now have an Airtable Base that looks like this:

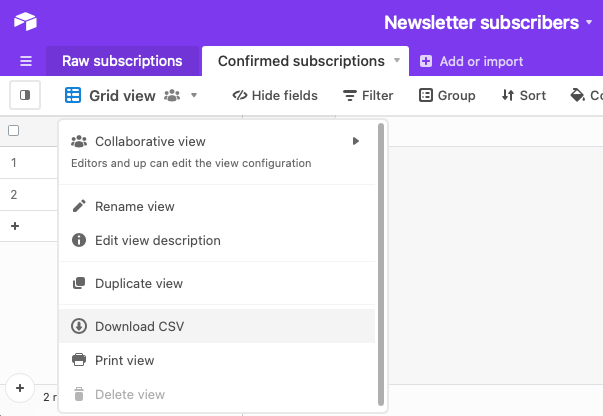
Vero Newsletters is designed to connect directly to the places that already store your customer data and load the latest copy of your audience data when you need it. We’re working on an Airtable integration (upvote it!) but, in the interim, sending a newsletter is as simple as exporting your data from Airtable via CSV:

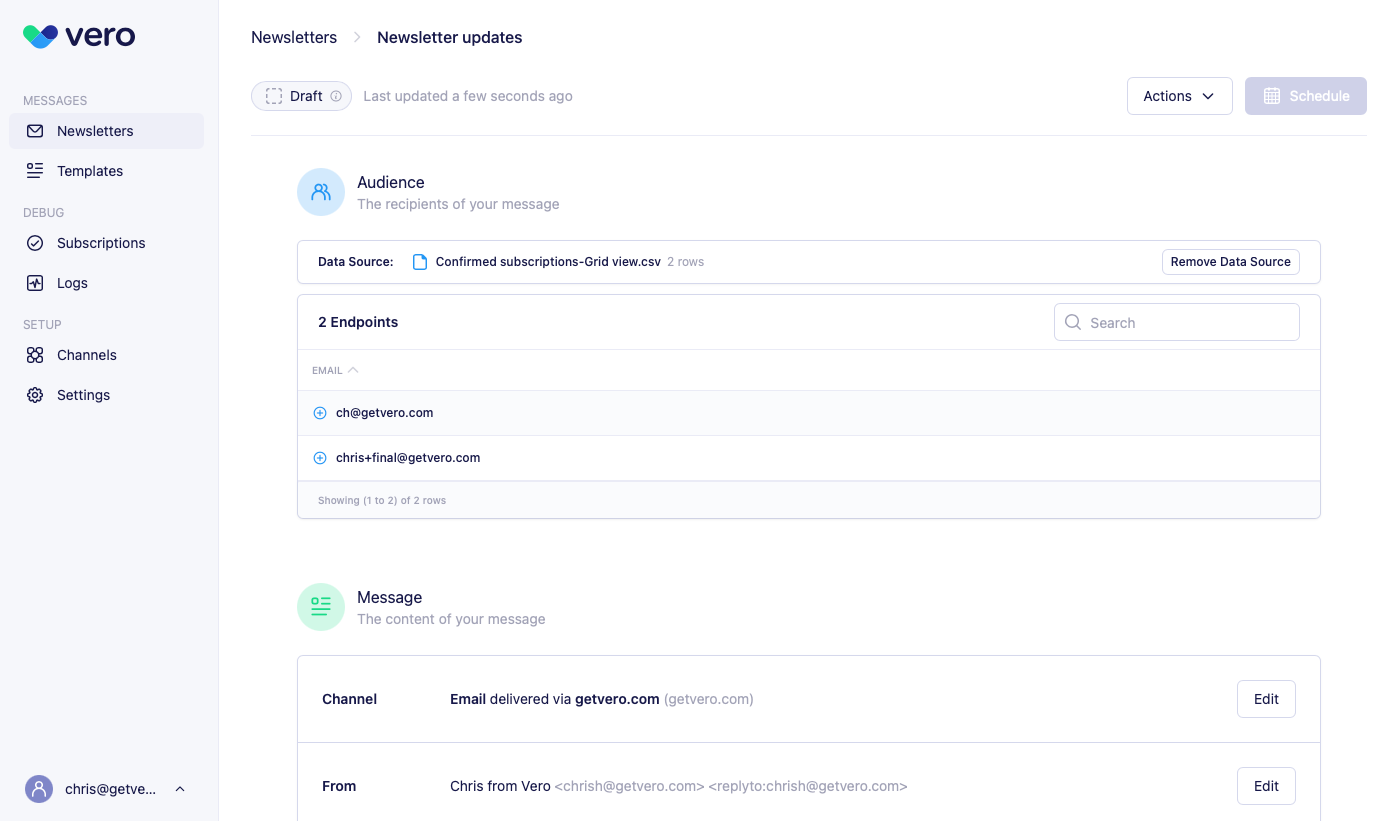
…then creating a new Newsletter in Vero and importing it:

Vero Newsletters will automatically generate an unsubscribe link that you can include in your Newsletter. Vero will not store a copy of your customer data but it will store a copy of those users who unsubscribe. When you go to send your second and third newsletters Vero will automatically remove those users who have previously unsubscribed.
In this way you can think of Vero Newsletters as a giant “filter” for unsubscribes.
Conclusion
We hope this tutorial gives you some ideas on how you can build, manage and use a newsletter subscription list with Netlify, Airtable and Vero Newsletters. We’d love to see what you build and hear your feedback.

